
There are times when you struggle to navigate your customer to the office. Especially when it is located in an obscure building somewhere inside suburbs. You may start to name such embarrassing and generally not appealing details as the color of the sing nearby or name a drugstore nearby. This is the situation when you may opt for Google Street View.
Google Street View – the technology is used for panoramic views of streets and buildings around the world. This feature was created by Google as an extension for Google Maps and available for mobile app developers as a dedicated SDK (software development kit), which allows integration of the feature into their apps.
You can find this service extremely useful while developing mobile apps for various industry domains. Here are some examples:
- Travel Industry. Obviously, there are many hostels hiding inside suburbs across the world.
- Sport & Fitness. The feature allows you to display and animate run training routes.
- eCommerce & Food Delivery. Can be applied for internal use in order to navigate couriers across the city.
And the list goes on. For instance, we in GBKSOFT found Street View extremely useful while developing a iOS app for traders and finance consultants. Thus, we’d like to share our knowledge with you!
This guide covers such topics as:
- Integration of Google Maps;
- Getting started with Google Street View;
- Setting up camera positioning in order to display the needed object;
- Testing and tweaking Google Street View.
Resources used for this guide: Xcode Version: 8.3.2, Swift 3.0, Google Maps SDK for iOS Version: 2.2.30010.0.
Setting up the Project
To get started with Street View to do a test project with minimal requirements. In this chapter we’ll describe how to create a mobile application for iOS and add Google Maps library using Cocoapods.
First things first, let’s create a new project in Xcode.
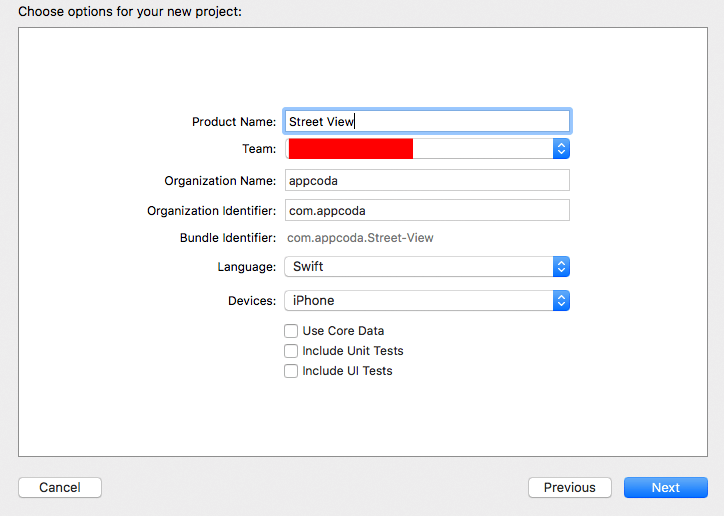
Project name: Street View
Bundle Identifier: com.appcoda.Street-View
Next, you need to add Google Maps library using Cocoapods.
Step by step:
- Go to the terminal;
- Open the folder of the project;
- Initialize pod and open it for editing.
Commands:
- cd <path-to-project>
- pod init
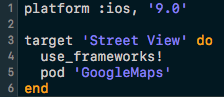
4) Add GoogleMaps library in the podfile:
5) Then, go back to the terminal and install this library:
pod install
6) Congratulations! You have a dedicated folder inside your project from where all the work with Google Street View will be handled:
<project_name>.xcworkspace
Open it!
Getting API Key
Now, you’ll need to get an API key, so your app could communicate with Google Maps service.
- First, create a project in GoogleAPIs.
- Go to: https://console.developers.google.com
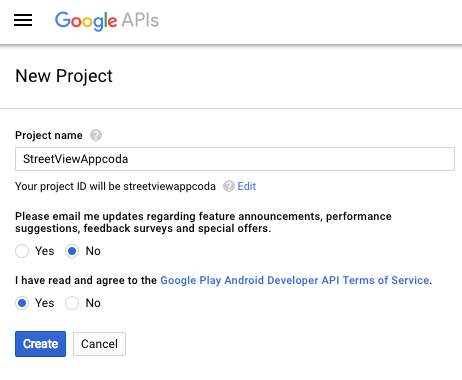
- Create a new project in there and name it.
Project name: StreetViewAppcoda
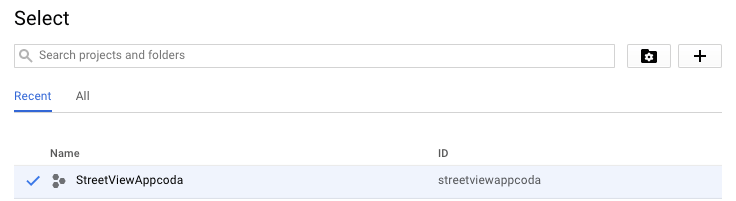
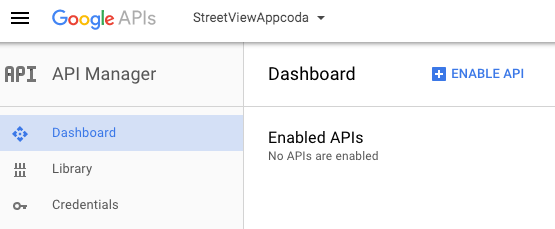
Let’s open your fresh made project.
And enable API in Google API Manager:
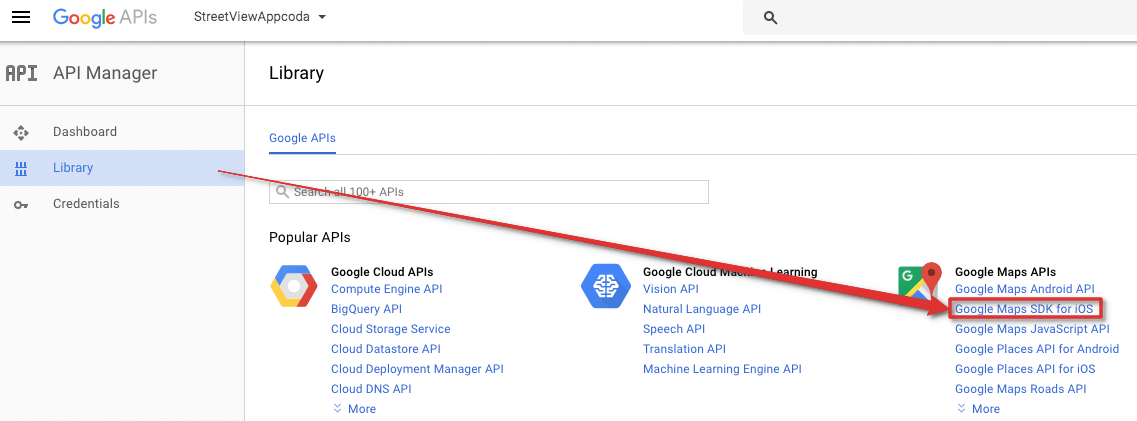
Next, we need to register our application in Google.
In order to introduce our new app to Google go to the Library tab and click Google Maps SDK for iOS.
Then, go back to the Dashboard and enable this particular SDK. You need to enable Google Maps SDK for iOS.
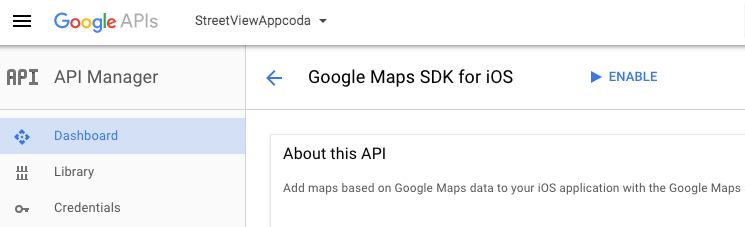
Here you go! Your app has just established the visual contact with Google. But Google is a super popular guy and everyone want to work with him. So, Google asks for additional credentials to get familiar with your app first.
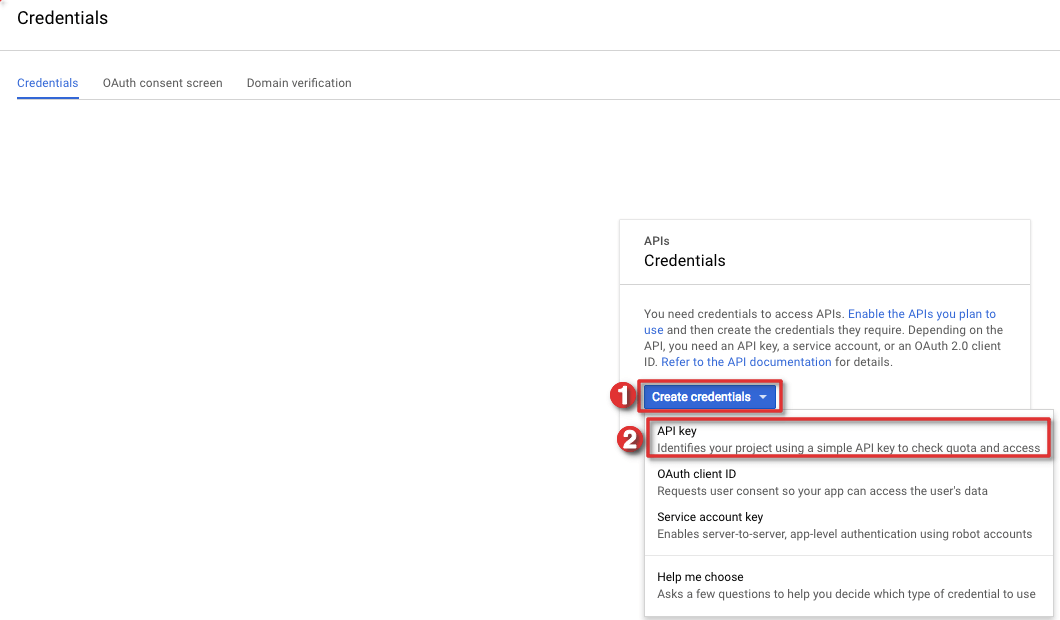
Go to the Credentials tab, click “Create Credentials” and choose “API key”, so the Google knew what’s you up to.
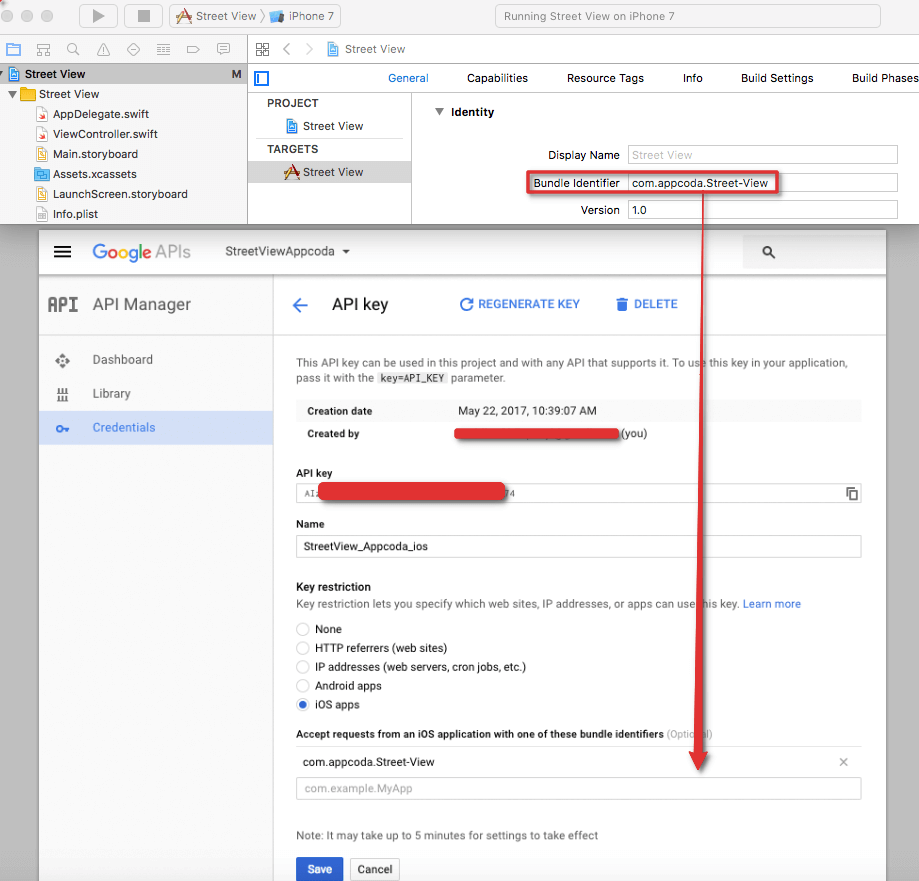
Then, go to API key settings.

Here you can finally introduce your app:
- Name your app: StreetView_Appcoda_ios;
- Key Restriction: iOS app;
- Bundle Identifier: the second code name for your app.
In order to get the Bundle Identifier:
- Go to the project;
- Select <project_name>.xcodeproj file (top-left: Street View);
- Select a Targets from the bar (Street View);
- Go to the General tab;
- Find Bundle Identifier field;
- Save it.
Configuring Google Street View
You made it! Your app has become friends with Google. Now, you can get to work in the SDK itself.
- Return to the project.
- Go to the AppDelegate.swift
- Import GoogleMaps
Initializes the Key obtained in the previous step through the method:
application(_ application: UIApplication, didFinishLaunchingWithOptions launchOptions: [UIApplicationLaunchOptionsKey: Any]?) -> Bool:
Commands:
- import UIKit
- import GoogleMaps
@UIApplicationMain
class AppDelegate: UIResponder, UIApplicationDelegate {
var window: UIWindow?
func application(_ application: UIApplication, didFinishLaunchingWithOptions launchOptions: [UIApplicationLaunchOptionsKey: Any]?) -> Bool {
// Override point for customization after application launch.
GMSServices.provideAPIKey(“<API-KEY>”)
return true
}
}
Now we need to place our panorama (Street View) on the screen.
- Go to File: Main.storyboard
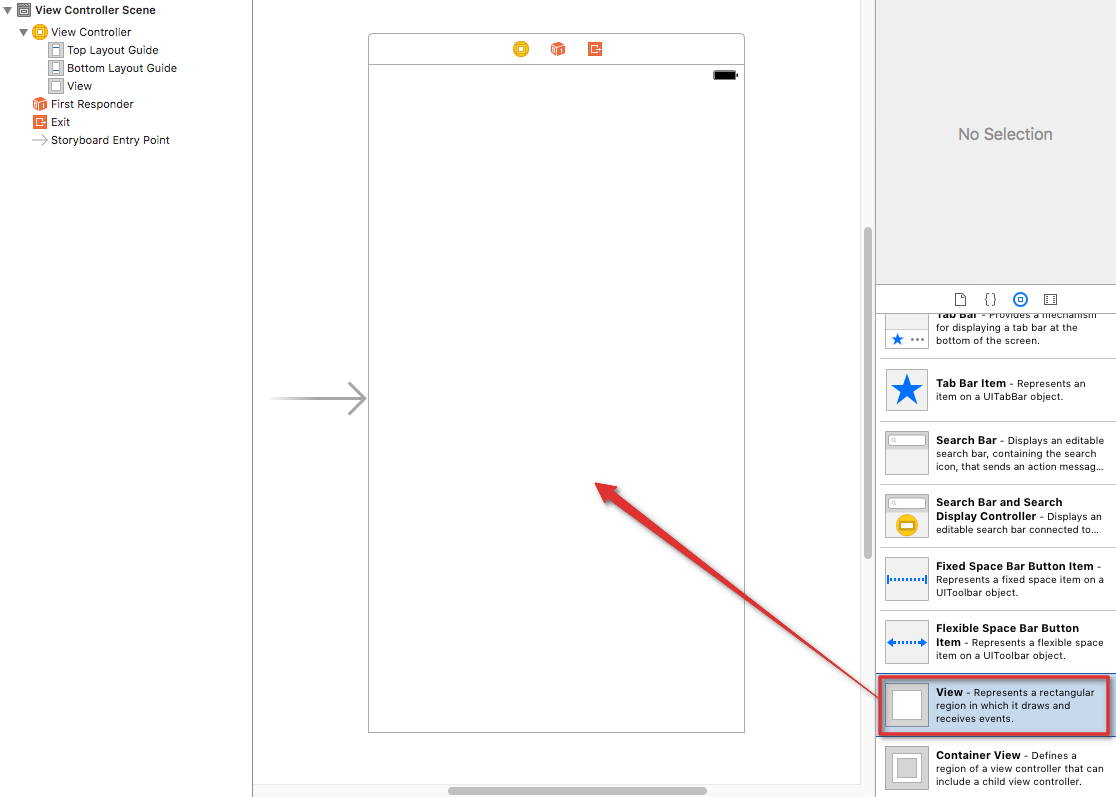
- Add View to the View Controller.
Instructions:
- Choose “Object Library” from the right, lower panel;
- Find the “View” element;
- Drag it to our ViewController.
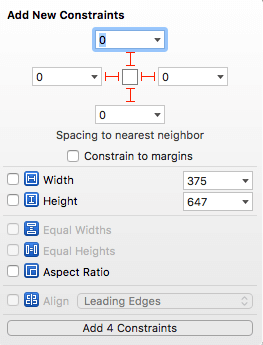
Then you need to add constraints to the View in order to set the placement of Street View on the screen.
- Choose View;
- Click on Add New Constraints tab;
- Add constraints as shown below.
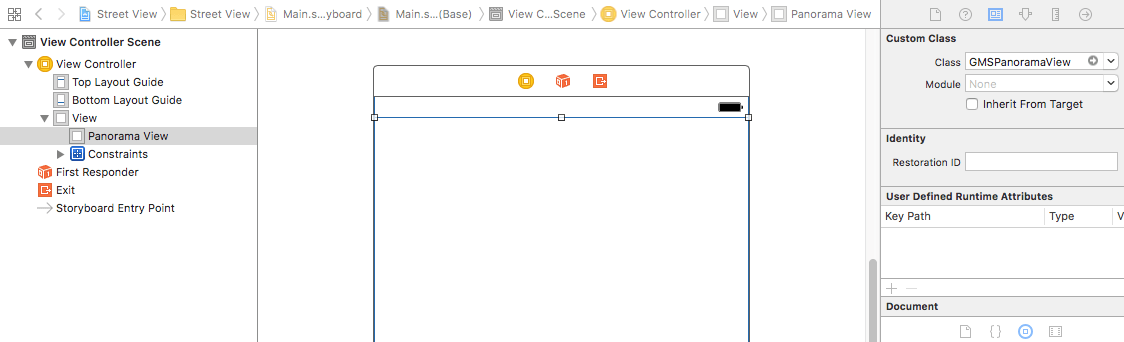
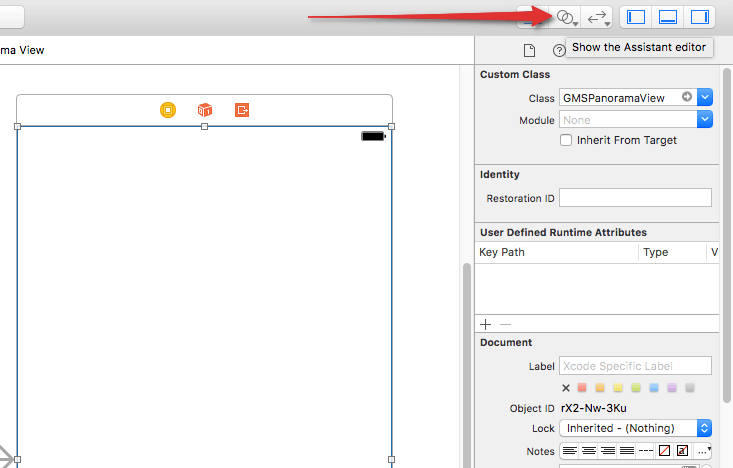
Specify the class for your View:
- Select the view;
- Go to the side menu Identity Inspector;
- In the “Class” field type GMSPanoramaView and press Enter.
Your View is ready! The last thing is to bundle the View to the code:
- Push Assistant Editor;
- Choose View from the left;
- Drag View to the ViewController file while holding down Ctrl key4
- Name it panoramaView.
- Move a file: ViewController.swift.
- Add library GoogleMaps
GoogleMaps:import
Open required coordinates in viewDidLoad method:
panoramaView.moveNearCoordinate(CLLocationCoordinate2D(latitude: 37.3317134, longitude: -122.0307466))
Type in Latitude and Longitude coordinates you need.
Apple’s Infinite Loop coordinates:
latitude: 37.3317134
longitude: -122.0307466
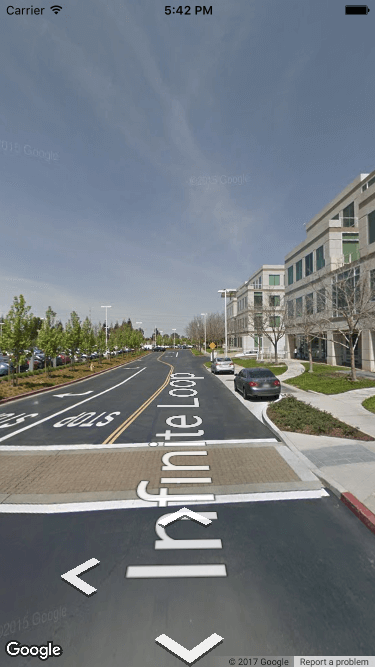
Now we can start a project. Here’s a street view of Apple’s Infinite Loop.
Naturally, you’ll want to turn the camera to the exact building/spot. Fortunately, there is a way to tweak View positioning.
- Get back to your draft;
- Go to ViewController.swift file;
- Override method viewDidAppear(_ animated: Bool);
- Add the animation to turn StreetView to the spot you need.
panoramaView.animate(to: GMSPanoramaCamera(heading: 90, pitch: 0, zoom: 1), animationDuration: 2)
Type in GMSPanoramaCamera parameters you need.
- heading – is the angle of rotation of the camera [values from 0 to 360];
- pitch – this camera angle [values from -90 to 90];
- zoom – zoom to enlarge this image [values from 1 to 5];
Use image below in order to determine the heading:
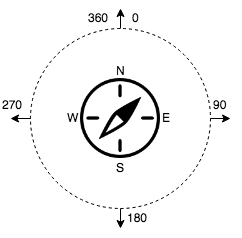
By default, camera direction is set to 0. For example, if you want to turn the camera from the street to Apple’s office you need to dial in 90 degrees.
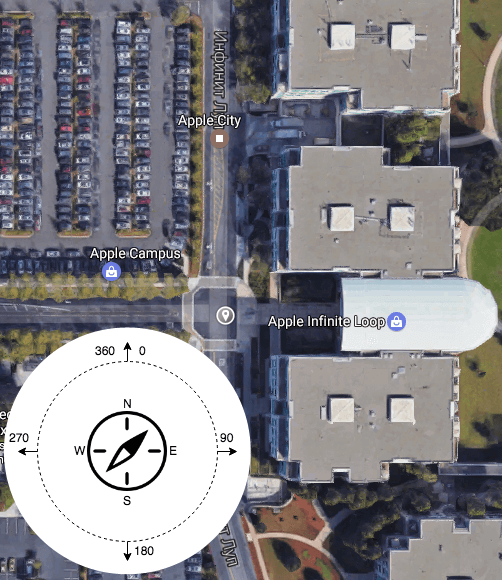
Use the image below in order to determine the pitch and choose the vertical angle. It is set to “0” by default.

Note: There is an optional value “AnimationDuration” which sets the time for the turn.
Now, add event handling after loading Street View:
- Go to the ViewController
- Add into viewDidLoad method:
panoramaView.delegate = self
Then, implement a protocol – GMSPanoramaViewDelegate.
Make this expansion in the class, that will implement ViewController:
protocol:extension GMSPanoramaViewDelegate {
}
You can handle various events from here, such as changing panorama, tapping on the, etc. For now, you need this method:
func panoramaView(_ view: GMSPanoramaView, error: Error, onMoveNearCoordinate coordinate: CLLocationCoordinate2D)
This method will be called in case if you couldn’t download the panorama using the method moveNearCoordinate.
For example, if you entered coordinates that don’t have Street View panorama. Using this code you can tell the user that there is no panorama for coordinates he is asking:
extension ViewController: GMSPanoramaViewDelegate {
func panoramaView(_ view: GMSPanoramaView, error: Error, onMoveNearCoordinate coordinate: CLLocationCoordinate2D) {
print(#function)
}
}
Here’s Google Doc with all classes and protocols used in the Google Maps SDK for iOS: https://developers.google.com/maps/documentation/ios-sdk/reference/
Here’s the useful one that allows you to hide a name of the street on Street View: panoramaView.streetNamesHidden = true
Result
Wrapping Up
It must be acknowledged that integrating Google Street View into iOS app it’s the hardest thing to do and in most cases worth the effort. While the feature is available from standalone Google Maps application almost on every mobile device, putting Street View directly into your app may increase the average usage time and user engagement rate.
Keep in mind that Google Street View comes with many cool features and methods that allow developer to go beyond the simple panoramic view. For instance, you can connect gyro to the panorama, so the user could turn the view by moving his phone. But this is a completely different story.
Good Luck!


